Category Archives: Archery Basics

How to Estimate Distance without a Rangefinder

How to Judge Distance without a Rangefinder

To Range or Not to Range

A laser rangefinder is an absolute necessity for compound bow shooters. Whenever possible I implore you to range the distance of any animal. This is especially important over flat ground and long distances.

That being said, all bowhunters must learn to judge distance without the aid of a rangefinder. When hunting in heavy timber, bucks can appear and disappear quickly, so you need to be ready for fast action. The majority of my trophies were taken on the fly with no time to range. Learning to judge distance without a rangefinder is something that can be easily practiced at home. Here are some techniques.

Practice Makes Perfect

Set your target in the weeds at an unknown distance, and then shoot from random yardages without ranging. After your first shot, verify the distance with your rangefinder. Do this exercise at every practice session and your distance-judging abilities will increase rapidly.

When you’re hunting in the woods you can take advantage of the vast amount of downtime by guessing random yardages of distant trees or rocks, and then verifying the distance with your rangefinder. This is both a fun and productive way to kill time afield.

Another exercise is to figure out the farthest distance you can throw a fist-size rock (it’s usually 40-50 yards). In the field, ask yourself if you could hit a certain object with a rock. Your brain already knows, through muscle memory, how far you can throw a rock, so you can pretty much gauge whether or not you could hit something with a rock by just looking at it. Then use that estimation as a reference. This method is surprisingly accurate.

Judging distance can be especially difficult over longer distances and flat ground. In these situations try using the twenty-yard addition method. You already know what 20 yards looks like, so you can figure out longer distances by finding a spot 20 yards away, and then another spot 20 yards beyond that until you reach your target. Keep adding 20-yards until you reach the target. It works!

Bowhunting Top 10 Tips for 2021

Bowhunting Top Ten Tips for 2021

In reviewing notes for my last 25 years of bowhunting, I decided to compile a list of my ten tips for bowhunting success.

  1. Hunt where the deer are, not where you want them to be. Use the off-season to study, scout, and explore promising new areas. Always have multiple areas for opportunities.
  2. Be a wilderness athlete. At the very least maximize your physical fitness—especially cardio—so you can actually make it to where the deer are. Minimize your body weight and field gear so you can go farther and  move with stealth.
  3. Learn everything about your prey. Study books, videos, and actual deer behavior. Become obsessed with the daily lives of deer, not just hunting.
  4. Avoid people at all costs (it gets harder every year). Deer hate people more than anything! As a rule, you need to put as much energy into avoiding people as you do hunting. Nothing good ever lasts, and eventually you will lose your secret spot to the crowds. So be adaptable and mobile, ready to cut your losses and find a new area at any time.
  5. Maximize time afield. Hunting is equal parts skill, luck, and time. The longer you hunt, the higher your chance of finding or lucking into a big buck. Spending a more time afield is the only way to attain the experience you’ll need to hone your hunting skills.
  6. Scout effectively. Whenever possible, locate your target buck before the season starts. Off-season scouting begins the day your hunt ends.
  7. Get as close as possible, and then let things play out naturally. Rarely can you force the situation with big bucks. They are extremely wary and fragile. Hunt them on their turf and on their schedule. Success is simply the result of many good decisions plus time and luck.
  8. Flawless shot execution. Shooting your bow must be effortless and subconscious. If you can’t shoot straight under pressure then nothing you’ve done up to this point matters.
  9. Hunt alone. The ultimate goal in bowhunting is not to even exist., to become invisible to the deer. Hunting alone reduces your scent, sound, and visibility. More importantly it allows you to focus on your instincts and innate skills rather than hunting by committee.
  10. Be eternally open-minded and humble. Great hunters learn something new every single day they spend afield. The moment you become an “expert” is the moment you stop learning.

I hope you enjoyed my tips. Did I miss anything?

Bonus Point System Failure

Bonus Point Implosion

Introduction

The goal of this website is to help archers of every age and background find more success afield. Unfortunately the greatest obstacle to success these days is simply procuring a hunting tag!

Back in the eighties and nineties a hunter could swing by a sporting goods store on his way out of town and buy an OTC deer tag. Today, just drawing a general tag for a lousy unit can be a multi-year fiasco. The problem is simple:  supply and demand; too many people vying for our scarce resource, our wild game animals.

The Point System

A couple decades ago most states attempted to rectify this problem by instigating a bonus point system which gives preference to those hunters who’ve been applying the longest. Although the point system varies somewhat from state to state, applicants basically accumulate a bonus point for each year and species he applies for (and doesn’t draw), thus placing him further ahead in line as points are accumulated.

System Failure

The point system worked for awhile, but is now crumbling under the weight of exponential inflation, aka point creep. Presently, any new or young hunter entering the system will likely never draw a decent tag in his lifetime, much less a premium or once-in-a-lifetime tag.

Still, every potential hunter is required to pay an application fee or in some cases even buy a license just to apply for a tag he’ll likely never draw. Thus, the wildlife agencies get rich while providing virtually nothing in return. The once promising point system is quickly becoming a real scam bordering on a Ponzi scheme.

The Real Picture

To further understand the severity of the problem, let’s take a look at the coveted Utah Henry Mountains archery deer odds (see example photo below).

According to the 2020 draw odds, it currently takes 21 points (see figure 1) to guarantee a deer tag. But don’t be fooled! That doesn’t mean if you start putting in today you’ll draw a tag in 21 years. Why?  Because there are 533 hunters ahead of you with 1 point or more.

The DWR only gives out 9 tags per year (5 going to max point holders and 4 to the random draw), which means all 533 people will have to draw with either max points or the random draw before it’s your turn. Therefore it will take 59 years (not 21) to reach max points. These “draw odds” are plainly shown at the bottom of the page (see figure 2).

But it gets worse. The draw odds are actually much higher than 1 in 59 because unless you have max points, there are only 4 tags in the random draw available to you and the other 528 applicants. So for 2021 the actual odds of drawing a random tag are 1 in 132! (see figure 3).

Can It Get Any Worse?

Yes, it always gets worse… Because 9 applicants are removed from the overall pool each year, you might think your odds are improving over time, but they’re actually getting worse. That’s because 42 new applicants are entering the pool each year. If this trend continues, your actual odds go from 1 in 132 (in 2021) to 1 in 140 in 2022, and so on. In other words, for next 59 years the odds of drawing a random tag go down each year.

Now if you think that’s bad, take a look at the Henry’s rifle deer tag which currently takes 191 years to reach max points. Or how about 971 years for the Henry’s bison tag? The point is, the vast majority of applicants will never draw a premium tag, but they’ll still have to pay a lifetime of app fees just for a sliver of chance in the random draw.

That’s bad news for hunters, but great news for the Utah DWR who receives 10 dollars per app per species per year with only a tiny fraction of hunters ever drawing a tag.

Currently the Utah DWR rakes in 1.5 million dollars per year in limited entry and OIAL app fees alone. If you add in non-resident fees, that number doubles to 3 million dollars. This amount doesn’t include the cost of the tag (assuming you ever draw one), so what are sportsmen really getting for their money? It smells like a scam to me.

The Solution

Since the point system is obviously failing, what’s the solution? A pure lottery system of course! Unless Utah and the majority of other Western states change to a lottery system, things can only get drastically worse, and fast.

Currently only two of the eleven western states have a pure lottery system:  Idaho and New Mexico. Long ago, and in the spirit of fairness, these two states anticipated the inevitable collapse of the point system and thus incorporated a pure luck draw.  Surely the other nine states anticipated the same, but the potential revenue in fees was just too much to ignore.

Thus, greed has turned the management of our precious game animals into big business. Remember, the animals belong to us, the citizens, not the state. Shouldn’t every citizen have equal access to his resources?

The Future

Inevitably, every state will be forced to change to a pure lottery system. This will obviously screw over thousands of sportsmen who’ve paid into the point system for decades, but the long-term benefits will be worthwhile, and here’s why.

First, at the current rate of inflation, most youth and novice hunters will never draw a decent tag in their lifetimes. Unlike previous generations, they don’t have fair access to hunting opportunities.

Second, a pure lottery system increases opportunity for everyone, especially hard-core hunters, by weeding out non-committed or fair-weather hunters who have little interest in hunting but still apply simply because they are too invested in the point system.

Thirdly, people’s lives, interests, and situations change over time. Most hunters would prefer to apply only in years when it’s convenient for their family situations, work schedules, or budgets.

Lastly, many hunters with unlimited resources use loopholes in the point system, such as building points with multiple non-hunting family members and then averaging in with them to get tags sooner than hunters who apply alone. Thus, a lot of great tags go to waste that would otherwise go to real hunters.

Conclusion

Bottom line, the point system is bad for all hunters, old and young, veterans or newbies, and good for the states who’ve turned our big game animals into big business. Rest assured the point system will fail someday, the only question is when? In my opinion, the sooner the better! The longer they wait, the more hunters will be cheated out of decades of investments.

Whatever the case, a pure lottery system increases odds and opportunity for everyone. Hunters will finally be free to apply when they want rather than out of fear of falling behind in the pool and never drawing that long-awaited tag, whether they really want to hunt or not.

Advanced Archery Technique: The Relaxed State

The Advanced Archery Technique

All suffering is caused by desire.  -Buddha

Over the past several years I’ve taught hundreds of people basic archery. Of all these students, only a handful are what you might call “naturals.” They follow instructions carefully, excel quickly, and break through to the next level at an astonishing pace.

But even these “naturals” eventually hit a wall: their accuracy plateaus, they fatigue out, and eventually falter. At this point they often turn to me and ask, “What now? I’ve mastered the basics, but how can I hit closer to the bullseye?”

As their intrepid instructor, it’s my duty to guide these students to the next level. The problem I had early on–and what my students didn’t know–was that I too was wondering the same thing! When you’ve mastered the basics–that is, when you’re executing the shot sequence flawlessly and still coming up short–how do you increase accuracy?

For the first time in my career I had no choice but to break down my shot sequence and see where potential weaknesses could set in. Here’s what I discovered.

The Problem

The thing that gets between the bow and the target isn’t the arrow,  it’s you! Every archer, no matter how advanced, goes through slumps. A few missed shots quickly erodes confidence by allowing negative factors such as fatigue, discouragement, and desperation into the shot. It’s a vicious cycle: the harder you try, the worse you do.

The Fatigue Factor

Physical fatigue is the greatest negative factor, especially for the beginner who hasn’t yet developed his back muscles. Just as he begins hitting close to the bullseye, he fatigues. But there’s also mental fatigue, caused by trying to over-aim the arrow into the bullseye again and again.  Finally there’s spiritual fatigue, the byproduct of chronic misses. In the end, all this fatigue erodes confidence and creates a downward spiral.

Zen in Archery

From the Zen perspective, all suffering comes from desire. Desire, of course, is healthy and even necessary for any activity. But when desire turns into obsession, that’s when we suffer.

In archery you suffer from your very first shot. You strain physically under the weight of bow while your mind strains to aim the arrow. And when your arrow falls short of the bullseye, your spirit strains from the pangs of failure, resulting in desperation.  In short order, your whole being–mind, body, and spirit–is strained!

I see this all the time. The student grasps another arrow, and another, faster and faster while simultaneously grasping for the bullseye which is rapidly becoming an impossible target. Very quickly he creates the bad habit of high-stress archery, which can take a long time to fix.

So, what’s the fix? It’s simple.

Instead of drawing the bow to a state of high tension, we need to learn how to draw to a relaxed state. Drawing to a relaxed state removes your self from the shot by eliminating negative influences over the arrow. Hence, your bow shoots itself. In Zen archery, eliminating your “self” removes desire, which in turn removes stress and suffering.

The Relaxed State Exercise

  1. Bring only one arrow with you on this exercise.
  2. Set up five paces from a large, blank target.
  3. Load the arrow.
  4. Stand up straight and spread your weight evenly between your feet.
  5. Grasp the string firmly and draw to your face while taking a deep, deep breath.
  6. At full draw, look up and away from the bow. Look at the sky and the clouds and the trees. Breathe out, and back in again. Feel the strength of your body as it overpowers the scrawny bow. Forget the bullseye; no one cares if you hit it anyway! Say to yourself, “I’m more relaxed than I’ve ever been in my life.”
  7. Now let down the draw smoothly; don’t shoot the arrow.
  8. Catch your breath.
  9. Repeat the process, only this time, when you’ve reached your highest  state of relaxation, release the arrow. Don’t aim at the target. Just relax your shooting hand until the shot goes off. This is what a relaxed arrow feels like.
  10. Maintain this relaxed state as you walk to the target and pull your arrow. Repeat this process over and over until it becomes habit.

That’s all there is to it. You are now drawing the bow to a state of high relaxation rather than a state of high stress. You’ve turned a bad habit into a good habit.

Real Life Example

One day I approached a talented young student who was literally drawing a circle around the bullseye with errant arrows. Wide-eyed and desperate, he turned to me and pleaded, “What am I doing wrong?!” I watched him fling yet another arrow just outside of the bullseye. I told him, “You’re trying to hard.” I went on to explain that missing the target wasn’t the end of the world; that his passion for archery–the whole meditative process–was far more important than a single bullseye. I had him breathe deeply and look around at the beautiful mountains. A moment later he calmly drew his bow and sank the next arrow into the bullseye. His face lit up and he hugged me. Years later he still talks about his enlightening experience.

Conclusion

Your bow is designed to shoot a perfect arrow every time. The arrow only misses if you let yourself get in the way.

For every student that asks, How can I shoot more accurately?, there are a few others who comment on how meditative archery is; how it relaxes and focuses the mind. These students typically aren’t the best archers at first, because to them the process outweighs the result. I view these students as the real naturals, and they even prove it when, eventually, their arrow finds the bullseye with seemingly little effort.

Shooting in a relaxed state is the secret to Zen archery. On a grander scale, you might say that living in a relaxed state is the secret to a Zen life!

Always Pull Another Arrow


Always Pull Another Arrow

This is one little–but all-too-important–hunting skill that bow hunters should be practicing. It might seem intuitive that, immediately after your first shot, you should be pulling and loading another arrow. But it’s not.

The wait-and-see approach can make all the difference between success and failure. This is why you hear guides on hunting shows always pleading, “Shoot again, shoot again!”

Bow hunting is different than gun hunting insomuch that the animal often doesn’t realize you’ve shot, especially at longer distance where he doesn’t hear the shot. Sometimes the animal doesn’t even know he’s been hit, which can afford you a follow up shot!

Hit or miss, your non-bow hand should be immediately grasping and loading another arrow. It’s one of those skills that’s acquired over time through real-life hunting experiences, but rarely practiced.

Now, I don’t want to pick on my wonderful bowhunting wife, but here’s a classic example:

On our first archery turkey hunt, we called up a group of mature toms. Forever they gobbled while cautiously circling us, so we moved in on them. When the biggest tom broke the treeline, I whispered the yardage and Esther let an arrow fly…and missed. The tom jumped, then meandered off. Desperately I whispered, “Shoot, SHOOT!”, but when I turned around, I saw that Esther hadn’t loaded another arrow. What seemed intuitive to me was not intuitive to a newbie-hunter.

Practice Makes Perfect

To avoid this mistake I recommend incorporating a simple shoot-and-pull technique into your regular practice routine. Note: It’s best to use a real-life 3D animal target to help train your brain for real-life scenarios. Here’s how it’s done:

  1. Shoot your first arrow. Hit or miss, you have five seconds to…
  2. Pull, load, and shoot a second arrow.
  3. Repeat.

Pretty simple, huh? Given enough time afield, I guarantee that practicing this technique will one day save your hunt. Hit or miss, having a second arrow ready can make all the difference between success and failure.

Bow Accessories: Moving Parts vs. Fixed

Bow Accessories: Fixed vs. Moving Parts

When it comes to modern bow accessories, your options are unlimited. Some parts move–like slider sights and drop-away rests–and some are fixed–like stabilizers and quivers. Today we’re going look at the potential drawbacks of having moving parts on your bow setup.

I’ve tried a myriad of accessories in my time, but last season really forced me to reconsider some of my choices. Here’s what happened:

In 2017 I got a brand new, high-performance speed bow to replace my old single cam bow. This new “speed” bow shot field points wonderfully. Then, about a week before the hunt, I screwed on my time-proven broadheads and they flew all over the place! After many fruitless hours of trying to re-tune the bow, I gave up and switched to mechanicals. And all was well…until…

Half-way through my deer hunt–and 300 miles from home–I was taking some practice shots at camp when my slider sight stripped out and no longer functioned. Try as I might, I couldn’t fix it. Fortunately I had an old multi-pin sight on my backup bow. I bolted it on and all was fine.

But this got me thinking…

Since its invention in 1969, the compound bow–and every accessory that can be attached to it–has been reinvented or re-engineered over and over again. The old “stick-and-string” has become an extremely complicated instrument of death…which is good…but maybe too good. Why? Because the more complicated something is, the more can go wrong.

Bow Accessories to Consider

In this article I’m going concentrate on the four major moving parts of your bow setup that you may want to reconsider before heading into the backcountry:

  1. The Arrow Rest:  There was a time when the arrow rest was just a shelf cut into the bow. Before that, it was your knuckle. Now it’s up-and-down-swinging tuning fork contraption tied to a buss cable. Almost every bowhunter I know uses one. But not me; I use a Whisker Biscuit. The Whisker Biscuit is a shoot-through containment rest (aka capture rest). It bolts into position and holds your arrow securely in place. Unlike popular drop-away rests, the Biscuit has no moving parts. The arrow simply shoots right through it. The only drawback is an infinitesimal reduction of arrow speed caused by friction between the arrow vanes and the whiskers. I use the Whisker Biscuit because it’s reliable and simple. It’s also inexpensive; about half the cost of a decent drop-away rest.

    The time-proven Whisker Biscuit.
  2. The Bow Sight: You have two options: Fixed pins or movable pins (aka slider sights). I used a fixed pins for twenty years, and then one day I fell in love with the slider sight. The slider sight was simple: one movable pin that doesn’t block your target. You just dial up the yardage and shoot. Then one day my slider broke right in the middle of my hunt! Now I’m back to fixed pins. I sure like the idea of a slider sight–and may go back to it someday–but for now I’m sticking with the multi-pin.
  3. Bow Cams: Almost every modern bow is powered by either single cams or dual cams. Cams are the power engine of your bow, so this is a major consideration when choosing a bow. Basically, single cam bows are more simple and easier to tune than dual cams. The major drawback to single cams is they produce a slower arrow speed. Dual cam bows (aka speed bows) are faster, but harder to tune because, a) both cams must roll over in perfect synchronization, and b) the extreme velocity of the arrow accentuates slight imperfections in bow tuning, broadhead design, and shooting form. These days bow manufacturers claim to have conquered tuning issues by tethering the dual cams, but in my experience dual cam bows are still more difficult to tune. I’m sure it has a lot more to with blistering arrow speed than tuning, but just remember, accuracy suffers when adding extra speed. This leads us to broadhead selection.
  4. Broadheads:  Almost all broadheads fall into two categories: Fixed blade or mechanical (aka expandable). Simply put, mechanical blades fold into the tip during flight, and then expand on impact. Because the blades are hidden, they are less affected by wind resistance and planing. Thus, mechanicals are more accurate than fixed broadheads, especially on speed bows. The major drawback of mechanicals are twofold: a) more moving parts make them susceptible to breakage on impact, and b) less penetrating power due to energy loss during blade deployment.
    Mechanical vs. Fixed broadheads

    Fixed blades are inherently stronger and have better penetration than mechanicals. However, they can be difficult to tune with modern speed bows. The most important factor in choosing a broadhead is how well it shoots through your bow. Personally, I prefer fixed blades with my single cam bow and mechanicals with my dual cam bow. FYI, the most accurate  fixed-blade broadhead I’ve ever used is the Trophy Taker Shuttle T, and my favorite mechanical is the Rocky Mountain Warhead. Note: the Warhead is extremely reliable and inexpensive (only $19.99 per 3 on Amazon).

Conclusion

Compound bows are much more complicated than they used to be, which is good and bad. Bow manufacturers tout speed as their primary selling point, but faster bows aren’t necessarily more accurate. The same concept applies to arrow rests, bow sights, and other accessories. Newer isn’t always better.

When it comes to equipment selection, I recommend keeping it simple. And when it comes to moving parts, less is more.

Consistent success afield comes from skill and woodscraft, not gear. As always, I recommend focusing more time and energy on the process and less on equipment.

Good luck!

Stop-Rot: Saving Your Hide!

What is Stop-Rot and why do I need it?

Stop-Rot is an anti-bacterial liquid preservative that “extends the work time of a fresh hide by slowing down or stopping decomposition,” thus saving your trophy hide from decay and hair loss.

Stop-Rot was developed by taxidermist/chemist, Glen Conley, specifically for saving hides from hair slippage ahead of the tanning process. It has been used widely in the taxidermy industry for many years, and now hunters are starting to use it too.

After killing your trophy animal, bacteria immedately begins to multiply all over the animal, especially around wet and bloody areas. In a relatively short period of time, bacteria begins to attack the skin and and hair follicles, thus leading to hair slippage and a ruined hide. A good taxidermist can fix almost anything, but very little can be done to save a hide with hair falling out.

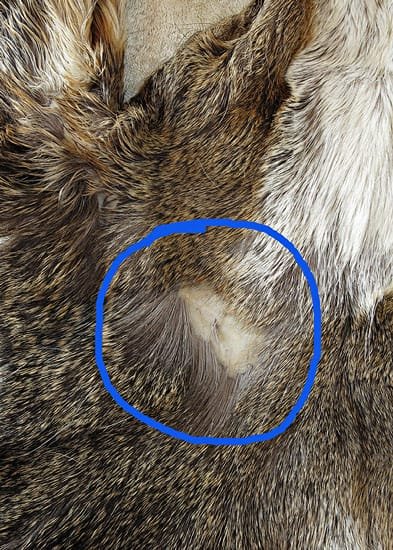
Hair Slippage: This hide was ruined by bacteria before it even arrived at my shop.

Because bacteria thrives in warm temperatures, Stop-Rot is especially useful during early-season hunts that occur in August and September. Traditionally salt was used to preserve hides afield. However, salt dries out the hide and makes it virtually impossible to flesh properly before going into the tanning process.

How to Use Stop-Rot

Stop-Rot can be used on both the flesh side of the hide and the hair side. The instructions say to “apply Stop-Rot as soon as possible after the animal has been skinned.” For this reason I always keep a bottle of Stop-Rot back at camp. I’ll spray it on any bloody spots or short-haired areas like the face and ears. I just spray it on and massage it in. Be sure to spray a light coating over the entire flesh side of the hide.

Applying stop-rot to a freshly-skinned hide.
Apply Stop-Rot to facial areas including eyes, ears, mouth, and nose.

Where Can I Buy Stop-Rot?

Stop-Rot costs around $23 a quart and is only available through taxidermy supply companies like Van Dykes or Trufitt. To avoid paying shipping, request a bottle from your taxidermist. If you live it Utah, you can buy Stop-Rot at Trufitt’s taxidermy supply store at 1744 South Redwood in Salt Lake City. In Southern Utah you can get it directly from me. I never go hunting without this product.

Conclusion

Stop-Rot should be used when hunting in warm conditions or any time you can’t get your hide to a freezer or taxidermist in a timely manner. Although I’m constantly touting the benefits of Stop-Rot, I don’t receive any sort of commissions from it. My taxidermy business, however, relies on usable hides. More importantly is the preservation of your hard-won trophy.

Stop-Rot: Use it or lose it!

Best Pre-Hunt Preparation: The 3D Archery Range

Preparing for the Hunt at the 3D Archery Range

With the Utah archery hunt just weeks away, it’s time to get serious about pre-hunt preparation. Over the years we’ve discussed several ways to prepare for the hunt; things like exercise, scouting, mediation, and shot execution. But nothing gets you ready for real-life hunting like the 3D archery range.

What is a 3D range?

A 3D range is simply a series of life-size, foam animal targets set up in a natural environment. The targets are roughly the same size and shape as real animals. Just like regular square targets, 3D targets have a series of concentric circles overlaying the vitals, but are nearly impossible to see at any distance. This aids in proper shot placement while allowing you to score your shot.

Fun for the whole family:
Russell and his son harvest some foam.

How is a 3D range beneficial?

How is it NOT!? A good outdoor range is set up in a life-like manner so that some shots are uphill or downhill, through brush and trees, and at various random yardages. Add to that odd angles, wind, bugs buzzing around your head, uneven terrain, sun in your eyes, back lit targets, and sweltering heat…well it’s a recipe for a real-life hunting experience! And that’s why it’s so crucial to try the 3D range at least once before the hunting season begins. It’s also a ton of fun for everyone.

Jerry missed high and right…

What can I expect to learn at the 3D range?

Right away you might be disappointed by your lack of shooting skills; and that’s the point. Most people start the summer by shooting on flat ground at square targets with bright bullseyes. That might be fine for sighting in your bow, but over time it does more harm than good. That’s because you’re training your mind to shoot under very predictable conditions.

The 3D range–on the other hand–mimics adverse conditions that you will certainly find in the woods, and therefore trains your mind to expect the unexpected, a skill that’ll prove invaluable afield.

Esther nails a 55 yard bison bullseye.

How can I maximize my 3D experience?

The most effective way I’ve found to maximize your 3D experienc e is to shoot two arrows per target. The first arrow should be shot  by estimating the distance without a rangefinder. The second arrow is shot after verifying the distance with a rangefinder. This method really helps rain your eye to judge distances for situations where there’s no time to range the animal before the shot.

You should also shoot from various body positions like standing, kneeling, or even squatting to keep your arrow from hitting an overhanging branch.

For the best possible experience, hit the range with a buddy or two, and be sure to keep score. After teaching archery for four years, I’ve found the best way to tighten up an arrow grouping is to engage in a little competition. Pride might be enough to ignite a fierce competition, but toss a few bucks in and watch the competition soar.

Splitting arrows on a wolf target.

Conclusion

No matter what city you live in, there’s likely a 3D range nearby.  If you don’t have access to a range, you can always purchase a few 3D targets from any outdoor retailer. 3D targets are quite expensive, but having one or two on hand will prove invaluable for your hunting skills.

I suggest visiting a few different ranges, and then concentrate on the most challenging one. For best results bring some friends and really push yourself. Shooting the 3D range is the most effective way I’ve found to improve shooting skills before entering the woods.

Why I Switched to a Single-Pin Slider Bow Sight

Montana Black Gold Ascent single-pin “slider” sight.

Why I Switched to a Single-Pin Slider Bow Sight

Watching my arrow sail harmlessly over a world-class buck at 50 yards wasn’t heartbreaking; it was traumatizing! After replaying the shot over and over for a year, I concluded it was either an error in ranging, or more likely I settled the wrong pin due to buck fever. Consequently I made some drastic changes to my bow setup last year, starting with my bow sight.

Standard multi-pin bow sight.

For years I used a standard multi-pin, fiber-optic bow sight. When the single-pin (slider) sight came out, I wrote it off as just another unnecessary gadget that would likely introduce more problems than anything. But after carefully weighing the pros and cons, I decided to try it–and I’ll NEVER go back. Here’s why:

Single Pin Pros

1) It’s far easier to focus a single pin on a small target than to wade through multiple-pins–or worse yet, shooting between the pins–especially under high stress.

2) Multiple pins–whether 5 or 7–take up way too much space in the sight picture. A long row of pins is not only distracting, but blocks much of the target or animal’s vitals.

3) If you’re shooting heavy arrows and/or pulling a light draw weight, the pins on a multi-pin sight will be spaced widely apart. This adversely affects accuracy. A single-pin sight that can be dialed to the exact yardage has proven to be far more accurate in my experience.

Single Pin Cons

1) The most obvious drawback to a single-pin sight is that every time the animal moves, you have to re-adjust the sight. If the animal moves quickly, or is moving away or towards you, it can be very frustrating. But after actually using it in the field (and arrowing three animals in 2016), I realized just how rare these scenarios occur. In most cases you’ll have plenty of time to re-range the animal and move the slider; it only takes a second.

2) Moving a single-pin sight creates extra movement. Again, this proved to be a nonfactor. When hunting in thick timber, I leave my pin set at 20 yards and don’t worry about it. If an animal busts out at 25-30 yards, just hold a little higher. When I’m hunting more open terrain I leave the pin at 30 or 40 yards, but it really doesn’t matter because animals that far out are usually calm and won’t notice the slight movement of my hand. After all, just drawing your bow creates far more movement than scrolling a slider wheel.

Final Note

Just about every archery accessory manufacturer makes a single-pin sight now. My only recommendation is buy a sturdy, all-aluminum model that can stand up to the rigors of hunting.

If you’re not ready to commit to a single-pin sight, then you should consider a hybrid sight. In a hybrid sight the top few pins are fixed, but the bottom pin is movable. This solves most issues listed above, but again, you still have multiple pins blocking the target. My advice is to keep it simple: one pin, one mountain, one giant buck.

Hunting Checklist

My Hunting/Camping Checklist

I just got back from an impromptu deer scouting trip, and right away I’m inspired to share my personal “hunting checklist.” My wife and I were in a hurry to get out-of-town, so naturally we forgot several things. I won’t make this mistake during my actual hunt, believe me!

Since bowhunting deer is the most important thing I do each year, I’m very thorough in preparation. I’ve been compiling this list for more than twenty years and adding new new items each year.

Note:  Some items don’t apply for short trips, or every trip, but it is very important to have a checklist handy so you don’t forget anything.

Do I miss anything? Let me know.

hunting camping gear equipmentchecklist
Bowhunting and camping checklist