How to Blood Trail Wounded Animals

Blood-Trailing Wounded Animals

Sooner or later every bowhunter will have to deal with a poorly hit animal. An ethical hunter must do whatever it takes to follow-up and recover wounded game. Arrow-hit deer rarely go down immediately, so every hunter needs to understand the basics of  blood-trailing. In this article we’ll look at some tips and tactics for tracking wounded deer.

An arrow kills a deer differently than a bullet. Bullets rely more on shock and devastating tissue damage, whereas an arrow kills either by massive blood loss due to arterial damage, or through asphyxiation by deflating the lungs.

A third and much less effective method is septic shock. Septic shock, or blood poisoning, is the result of gut-shot animals slowly dying as their stomach contents and bacteria gradually overwhelm the blood stream. Basically the deer dies from a full-body infection over the course of several hours or even days. Oftentimes the animal is lost because it bleeds very little and covers lots of ground.

Give it some Time

Unless the animal goes down within sight, you need to give it some time to die. Even if you’re confident in a heart or lung shot, you should still wait a half hour minimum before tracking.

If you suspect a gut shot, wait at least two or three hours before tracking, and then proceed very cautiously while glassing ahead. If it’s very cold out, it would be probably be fine to leave it over night.

Whatever you do, don’t go barreling in on the deer. Arrow-shot deer sometimes don’t realize they’ve been hit and will only run a short distance before bedding down. You do not want to bump the animal, but if you are able to stalk close enough, try to get a second arrow in the animal to put it out of its misery.

Weather Factors

You do not want to leave a mortally hit animal sitting for several hours in hot weather. Even a marginally hit animal will slow down and stiffen up within a few hours, so possibly bumping him is still better than letting the whole animal spoil overnight. Just use your best judgment based on the conditions you’re dealing with.

In rainy or snowy weather you should hasten your tracking job. Water will quickly wash away any blood, and snow can cover it up.

Where to Start

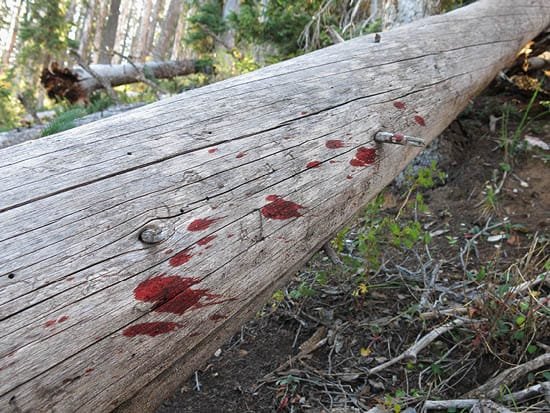
Immediately following your shot, mark the spot you shot from with orange tape, and then mark the place where the deer was standing. Next, see if you can find your arrow and inspect it carefully. Bright red, bubbly blood is usually lungs. Any green smears or foul smells indicates stomach, and very dark blood can anything from muscle to heart or liver. Heart shots are obvious as they tend to bleed profusely.

Once you’ve determined the quality of your hit, try to pick up the blood trail. The secret to successful animal recovery is moving slowly, as if you are still-hunting. Make very little noise and glass ahead frequently. If at all possible, move with a favorable wind.

While blood-tracking, plan on following both blood and tracks. Sometimes a deer will bleed completely internally, in which case you will rely more on tracking than blood-trailing. Fortunately running deer tend to leave very deep and obvious tracks accompanied by torn-up ground.

Inevitably you’ll get stuck with a very sparse or problematic blood-trailing job. If the blood trail is very light, you should follow these guidelines:

Tips for Following Sparse Blood Trails

  1. Don’t step on or disturb any blood specks or tracks. You may have to return back to these clues later on.
  2. Continually mark the blood trail as you go, either with a GPS, orange tape, or toilet paper. By keeping track of the trail you may be able to determine the general direction the buck is headed.
  3. In places where you are unable to see tracks, you can still determine the direction of travel by reading blood splashes: they always splash forward. If the blood trail is sparse, you can tell the direction of travel by which side of the grass the blood is on.
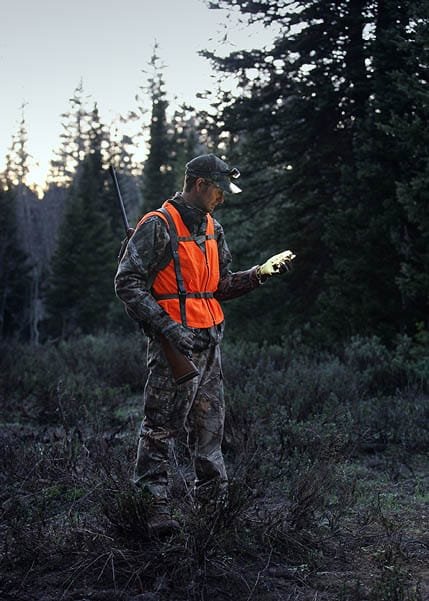
  4. In the evening you might have to track faster. It’s much harder to trail a buck in the dark, but if you must just be sure to have a very bright flashlight. This will not only help you locate more sign, but will light up the deer’s glowing eyes far ahead so you don’t bump him further.
  5. If the trail runs cold, consider enlisting the help of a blood-trailing dog. Dogs trained to follow blood trails are becoming a popular method for recovering wounded game. Once the deer goes down, it won’t last long sitting in the field, so consider getting the dog handlers contact information before the hunt.
  6. If you lose the trail completely, you will have to employ a “grid-search” beginning where the last sign disappeared. At this point you should be able to “guestimate” the deer’s general direction of travel. Use your GPS to keep track of everywhere you’ve been and where you haven’t. Because you are now on a timer, grid-searching should be done with as many helpers as possible.

Final Thoughts

Contrary to popular belief, wounded animals don’t go directly to water, nor do they run directly downhill. Rather their first inclination is to put as much distance between you and them as possible. Given enough time the animal will eventually seek out water, but don’t count on it.

As for direction of travel, I’ve seen mortally wounded animals run uphill or downhill. But more often they side-hill or slant downhill over very long distances. Once again, every shot situation is different, so use your best judgment.

On rare occasion a deer that seems mortally hit will escape and make a full recovery. This happens a lot with high hits in “no-man’s-land,” as it’s sometimes called. Other times the arrow may have only contacted muscle tissue. Either way, you’ll likely never catch up to the animal. That doesn’t mean you shouldn’t try; it just means there are times when you must throw in the towel. Only experience can tell you how to proceed.

How to Conquer Buck Fever


What is Buck Fever?

Buck fever is a state of panic brought on by an intense hunting situation, followed by a huge adrenaline surge. It’s basically your body’s fight-or-flight reaction. If you’ve never experienced buck fever, then you either haven’t seen a 200-inch buck up close or you’re just one cool customer.

For the rest of us, buck fever is a very real and formidable foe. It still haunts me today! When that long-awaited moment of truth comes, when that giant buck finally steps into the open, I feel like a little kid trembling in my boots. This intense excitement is why I love bowhunting so much. Unfortunately it’s also the reason I still miss shots on big bucks.

On my second archery hunt back in the nineties, I had a true monsterbuck step out broadside at 35 yards. Sure enough I came completely unglued and proceeded to send my arrow into the dirt at his feet.

Today’s bows are consistent tack drivers. Unfortunately we let ourselves get in it the way of their performance. The ultimate goal in archery is to eliminate yourself as a variable, and the best way to do that is through diligent practice.

How to Practice for Buck Fever

  • The most effective way I’ve found to practice for buck fever is by getting your heart rate up during practice sessions. You can do this by sprinting to and from your target. Start by shooting one arrow and then sprint to the target, pull the arrow, and sprint back. Shoot again and repeat. This will quickly get you’re your heart rate and breathing up. Do this exercise repeatedly until you are a huffing, puffing wreck. I’ll admit, this kind of practice isn’t very fun, but it’s the best way to prepare for buck fever.
  • Shooting competitively is another way to practice for buck fever. Every major city in the country has archery clubs and regular competitions. Shooting competitively and publicly puts the pressure on and ups the excitement level, especially when competing for money and prizes. Just like other adverse conditions practice, learning to shoot well under pressure is a valuable skill.
  • While hunting there are a few ways to cope with buck fever. First, try to slow your breathing. If you have time before the shot, take a few deep breaths and exhale slowly. Second, avoid getting tunnel vision. Tunnel vision is basically where you lose situational awareness because you’re hyper-focused on one thing, like the deer’s incredible rack. Instead, take a second to expand your view. Look around for any other deer that you might have missed. Whatever you do, don’t rush the shot. Most bowhunting scenarios play out slowly, and rushing things just causes mistakes.
  • When the shot finally comes together, put all your focus into following through. Hunters under pressure usually miss low because they “drop the bow” on the shot. Instead, focus on keeping your sight pin on target until the arrow hits. Keeping equal palm pressure across the bow’s grip also helps with follow through.
  • One more tip:  When a buck suddenly appears at close range, it’s common to misjudge the buck’s size amidst all the excitement. This can lead to shooting a buck you aren’t happy with. For this reason I refuse to pull an arrow until I’ve judged the buck and I’m sure he’s a shooter. Pulling an arrow creates momentum, and when you combine momentum with excitement it leads to smaller bucks, or worse, missing the big one.

Conclusion

These are the best methods I’ve found to practice and prepare for buck fever situations. Buck fever might be an incurable affliction, but it also means you’re passionate about hunting, and that’s a good thing.

Good luck out there!

Extending Your Effective Range

Extending Your Effective Range with Compound Bows

Let’s say you’ve mastered the fundamentals of archery, but you’re stuck with an effective shooting range of 50 yards. Any farther and you begin to miss the 9-inch bullseye. At this point, how do you extend your range?

Extending your effective range starts with shooting a flatter arrow trajectory (reducing the arc of the arrow). There are only three ways to do this.

#1.  Increase Draw Weight

First, you need to transfer more energy to your arrow by increasing your bow’s draw weight. Assuming your bow isn’t maxed out already, you can increase draw weight by simply tightening down the limb bolts. Depending on your bow, this will increase draw weight by 3-4 pounds per full turn. Just be sure to tighten both limb bolts equally or it will mess up your tuning.

#2.  Reduce Arrow Weight

The second way to flatten arrow trajectory is by reduce your arrow weight. This should only be considered if your arrows are already overweight for the game you’re hunting. For example, you wouldn’t want to go below 400 grains (total arrow weight) for deer, or 450 grains for elk. If you’re strictly a target shooter, then you can go as light as you want. However, going too light can be hard on your bow because not enough energy is transferred to the arrow.

Now, the only way to reduce arrow weight is by using lighter points, lighter fletchings, and/or shortening your arrows. In most cases it would be best to start with a brand new set arrows from your preferred manufacturer. Look for an arrow with a low GPI (grains per inch). Lighter arrows are generally rated around 8.0 GPI or less.

#3.  Super Tune Your Bow

The third way to flatten arrow trajectory is by super-tuning your bow. Tuning improves arrow flight by removing slight deviations  in your setup, resulting in more efficient arrow flight. The longer it takes for an arrow to straighten out in flight, the more energy is lost due to air friction. Too much wobble also decreases arrow penetration.

Super-tuning starts with a good paper tuning. This involves adjustments to your arrow rest and/or nocking point. Throughout this process you may need to adjust your bow’s cam timing or cam lean. These adjustments require the use of a bow press, so unless you have the one it would be best left to a professional.

Additional Methods

Aside from flattening your arrow trajectory, there are a few other ways to increase accuracy. They include:

  • Regularly practice shooting at very long distances. This makes shorter distances much easier.
  • Practice “surprise release” drills. This is especially important for people struggling with target panic.
  • Shoot smaller diameter arrows that are more wind resistant.
  • Consider using a one-pin sight. Single pin sights provide better target visibility, especially at longer distances.
  • If you are shooting an older bow, consider upgrading to a newer, faster bow, preferably with two cams. Single-cam bows tend to shoot slower because they don’t transfer as much energy as modern two-cam “speed bows.”

Conclusion

There you have it, everything you need to expand your effective range. With today’s fast-shooting, dual-cam bows you don’t have to sacrifice speed or energy to get a flat-shooting arrow. Just make sure your bow is finely tuned.

When it comes to hunting, shot placement is more critical than speed or kinetic energy. Shot placement means putting the arrow in the precise kill zone for maximum damage.

Above all, make each arrow count during your practice sessions. Always shoot for quality over quantity.

Confidence is Key to Hunting Success

Confidence in Hunting

A trophy hunter believes he can do it, and not in some cliché way. He actually believes he possesses all the right skills to find and arrow a giant deer. He trusts his decisions afield. He hunts in a relaxed manner while drawing from years of experience and a deep understanding of his prey. On any given day he expects to locate the biggest buck in the area. Having a couple big mounts on the wall back home certainly helps to boost his confidence.

One tenet in business is that success breeds success. Successful entrepreneurs often share a familiar story:  It takes years of work and many failures to earn their first million dollars, but only a short time to earn their second million. Success in any arena requires confidence.

Newbie bowhunters often struggle with confidence simply because they haven’t arrowed anything big yet. People transitioning to the bow from the gun sometimes lose confidence when they realize just how difficult it is to close the distance on a cagey old buck rather than sniping it from 600 yards across a canyon.

During my first bowhunt, after spooking several bucks out of bow range, I remember looking down at my 80s-model hand-me-down bow and feeling completely helpless. What I didn’t realize was that I was learning a lot about deer behavior with every encounter. The next season I arrowed a little 4×4 buck that had me brimming with confidence.

Hunting Mentors

Without confidence, you’ll continually second guess yourself. Which direction should I travel? Where should I sit in ambush? At this stage it’s helpful to have a mentor. If you don’t have a mentor, don’t despair; there are innumerable books, magazines, and online resources available that teach various hunting skills including locating, stalking, and field judging bucks.

Confidence increases as you learn about your prey and its behavior. Even before the season starts you need to get out there and put in some time scouting, tracking, and observing deer in their natural environment. The woods itself really is the best teacher. Learning how to identify big buck sign and habitat is key. No longer will you waste time in small deer habitat or nursery areas.

Before I ever bagged a real trophy buck I thought I was a decent bowhunter. It wasn’t until I went up against a true 200-incher that I realized how little I knew. Trophy bucks act completely different than smaller bucks; they really are entirely different animals. For two years I played catch up, reading everything I could find on mule deer while simultaneously spending more days afield. It finally paid off and I got my trophy. Now, when I enter the woods I truly believe I can find and harvest a trophy buck with some level of consistency.

Confidence in Archery

Confidence plays an important role in shooting skills too. You’ll be lucky to get one shot in a season, so you need to be intimately familiar with your bow. I recommend shooting your bow year-round in order to maintain your shooting muscles and maintain your effective range. Everything, from loading an arrow to drawing your bow undetected should become automatic.

Finally, confident hunters know when to pull out. What if your honey hole dries up or is overrun with other hunters? This happens all the time, so you need to have the confidence to abandon your traditional hunting area and find a brand new one.

Conclusion

When I set my annual goal to harvest a trophy, I envision a real monster buck with huge mass and wide-sweeping antlers. I am confident that at least one giant, stud-buck lives in every unit of my state. I just have to find it. I can set such lofty goals because I know I will consciously and subconsciously do things every day to reach my goal.

The difficulty inherent in bowhunting may lead you to believe that trophy deer are impossible to hunt. Sometimes we elevate these animals to mystical levels, viewing them as unhuntable specters of the woods. Big bucks might be masters of survival, but they’re still just big, stinky animals. When they bust out and fly away from us with incredible speed and majesty, they still have to go somewhere. As quickly as they disappear, they reappear somewhere else. Go out and find them. You are a good hunter; you can do it!

Ambush versus Still-hunting

Ambush vs. Still-hunting vs. Spot-and-Stalk

Ambushing

Because of the extreme wariness of big bucks, ambush hunting is the most effective style of bowhunting. In close-quarters situations, whoever moves first–you or the deer–is at a disadvantage.

Esther sitting ambush for turkeys.

In very thick brush or noisy terrain, ambush hunting might be your only option. This is why so many whitetail hunters sit tree stands. For mule deer, however, hunting from tree stands or ground blinds is only minimally effective because mule deer are so unpredictable. Therefore, ambush hunting is most effective only after you‘ve patterned a buck and are able to sit near prime feed or trails without being detected.

Ambush hunting is also a great option for novice hunters who haven’t mastered extreme stealth yet. It’s also a good technique in desert areas like Southern Arizona where sitting water is a viable option.

Still-Hunting

Still-hunting is the second most effective hunting method. Still-hunting is where you move very slowly through the woods while stopping frequently to glass and listen for movement. Still-hunting takes a lot of practice to master.

When still-hunting you must vary your approach speed as terrain changes. Whenever you come to a rise or break from heavy cover, stop and glass ahead. While still-hunting, try to keep to the shadows as much as possible since deer have a hard time seeing into shadows.

Still-hunting in winter.

The goal of still-hunting is to be non-existent. That means hunting against the wind while remaining perfectly silent. Different ground conditions will dictate the speed that you can travel. Still-hunting works best on soft dirt or wet substrates. When the ground is dry and crunchy, try to step on large rocks, logs or soft dirt patches whenever possible. If you continue to get busted while still-hunting, revert back to ambush hunting.

Spot and Stalk

Spot-and-stalking is where you glass up an animal at a distance and then implement a strategy to stalk close. Spot-and-stalk works best in more open terrain where you’re able to sit and glass for unsuspecting animals that move between cover.

Spot-and-stalk begins with glassing for animals and then planning an effective approach.

A successful spot-and-stalk strategy means planning the best approach based on wind and cover. In most cases the terrain will look differently as you close in on the animal. So it’s best to pick out prominent landmarks along the way, like a large boulder or dead tree. When covering very long distances it can also be helpful to take a reference picture before stalking just in case you get turned around.

Personal Preference

Ultimately the hunting style you choose depends on specific hunting conditions, terrain, and the method you’re most comfortable with.

Maybe I’m just impatient, but I prefer still-hunting over ambushing. I really like the freedom to move around and cover lots of ground. The majority of my trophies were taken while still-hunting, but in most cases I was lucky to either see or hear the deer before it saw me. It also helps to have thousands of hours practice.

Most of the time I will incorporate a hybrid-style of hunting that alternates between ambush and still-hunting. Basically I still-hunt around prime areas, and if I encounter a likely  travel route I’ll plant my butt in the shadows and sit ambush for longer periods of time .

Although most of my bowhunting takes place areas too thick for long-range glassing, I still rely on spot-and-stalk techniques when the occasion arises.

How to Hunt without Fear


How to Be Fearless Outdoors

Hunters of all ages—but especially young and inexperienced hunters—can suffer from fear of being alone in the outdoors. And it only gets worse after dark. Most hunting success comes very early or very late in the day, and this means venturing out in the dark.

Whether your fears are rational or irrational, conquering your fears is vital for success in any walk of life, but especially in hunting. A successful hunter must learn to be comfortable in nature.

There’s no shame being afraid; after all nature can be a dangerous place. People die all the time from predator attacks, lightning strikes, hypothermia, heat stroke, dehydration, getting lost, etc. These are very real concerns. Fortunately most fears can be eliminated with a little woods experience and some common sense preparedness. But first, what is fear?

What is Fear?

Is fear even real? Where is fear? Can you point to it?

Fear is just an abstraction. It’s a negative state of mind conjured up out of one’s imagination. In most cases you are simply reacting to an uncertain future . Other times you are reacting to bad associations from past experiences. Only rarely is fear justified, as with an immediate emergency. In these cases, fear can be deadly.

Reaction to danger causes panic, and panic only makes a bad situation worse. I’m not saying that danger isn’t real. Life is full of danger. But when danger arises, a fearless man acts, not reacts.

With a little practice you can learn to control your reactions and thus lose your fears. Let’s explore some methods.

Prepare for the Worst

Successful hunting in modern times usually means venturing into some pretty nasty country. If you aren’t prepared for wilderness conditions, then maybe you should be afraid. Being prepared for dangerous situations gives you confidence and alleviates fear.

The following are some basic preparedness techniques that will  help you gain confidence afield:

  • Always bring enough food, water and enough extra layers to survive a night in the wilderness. Have a way to stay warm and dry: carry a rain poncho, space blanket, and a fire starter kit. Pack a reliable flashlight and a water filter. You should also carry a signaling device such as a satellite phone, a mirror or a whistle. If you are hunting in an area with dangerous predators, maybe carry a sidearm.
  • Having a basic first aid kit is another good idea. The most important item in my first aid kit is duct tape. Quartering an animal in the backcountry can be a dangerous task. Duct tape and super glue can go a long way to close up deep cuts and lacerations.
  • A space blanket is the first thing I pack for any backcountry hunt. Space blankets are made from a very thin, lightweight Mylar material that reflects heat. On a recent winter hunt trip I had stove malfunction the very first night out. In the two hours I spent trying to fix the stove, I could feel my body temperature dropping steadily. When I realized a warm meal off the menu I immediately busted out my space blanket and wrapped it around my sleeping bag. It was a real lifesaver. Knowing you have a reliable way to survive the elements goes a long way in dispelling fears of being alone in the wild.

Facing Irrational Fears

Fears can be also be eliminated by simply changing your perspective on life. More than anything people fear the unknown; with death being the greatest of the unknowns. But is death really that unknown? All creatures die, so how is life any more mysterious than death? Going through life fearing the inevitable is nonsensical. Why worry about things outside of your control? Why be distracted from living because of concerns for the future?

There’s a lot of philosophy here, but what it boils down to is this: The only thing worse than dying is not really living. Focus on living while you’re alive; dying will take care of itself. Conquering fear of the unknown begins with losing your fear of death and embracing the unknown.

Fear of Failure

Lastly, we should address the fear of failure. Fear of failure is very real and should be avoided. This is my biggest fear. Bowhunting gives my life purpose. I put so much time and energy into bowhunting that when I fail I feel useless. But nothing good can come from fearing failure. It makes a person desperate, and desperation causes a person to make bad decisions. It also compromises your ethics. Worst of all, desperation takes the fun out of life and hunting. Hunting is recreation and should be always be fun!

Conclusion

Bowhunting is a privilege; the act of bowhunting is reward enough in itself without having to kill something. Bowhunting isn’t business; it’s not a game of numbers. Hunting success is a measurement of one’s skills, for sure, but it’s not the full measure of a man. You can still fail with dignity, knowing you did your best.

You are in the woods for a higher purpose. You have something to prove to yourself. Fear is never a reason to give up. Back home there is only failure, but in the woods there is glory.

Field Care: Quartering and Packing

Packing out a heavy mule deer.

Quartering and Packing

In the old days hunters often avoided hunting too far from roads simply because it would be too difficult to drag the animal out if they got one. A lot has changed since then. Today, backcountry hunters quarter or bone out their meat and then pack it out in a trip or two.

Quartering means removing the skin, all four quarters, the back-straps, and whatever other parts you wish to keep, including the ribs, neck meat, liver, heart, etc.

Boning means removing meat from the bones. Boning reduces pack weight by several pounds, but this method has its drawbacks. First, boning takes time to do it correctly. Secondly, it exposes even more meat to contamination from dirt, bugs, and hair. For this reason I advise against boning meat unless absolutely necessary.

Quartering and hanging an animal is much more sensible than gutting and dragging the animal out whole. A boned-out mule deer weighs about 90 pounds and can be packed out in a single trip if necessary.

An elk is about 3.5X larger than a deer. Boned or not, an elk will take two people several trips to pack it out. Whatever the case, just be sure you have an exit plan before launching an arrow.

The basics of quartering big game can be learned from numerous video tutorials found online. Then it’s just a matter of practice.

Quartering can be a daunting or even dangerous task when performed alone, especially on slippery or uneven terrain. Until you’ve gained some experience, try to enlist some help from fellow hunters for tasks like holding legs and hanging quarters. With a little practice, it can be accomplished alone.

Temperature and Spoilage

Heat is the number one concern with meat care. Bacteria grow  exponentially on a carcass if allowed to stay warm too long. Meat begins to spoil in temperatures above 40 degrees (fridge temperature). In 90-degree weather—which coincides with many archery seasons—meat can spoil in single a day.

The higher the ambient air temperature, the greater chance of spoilage. Ambient air temperature determines how much time you have to get quarters packed out and loaded into coolers.

When daytime temperatures are above 70 degrees, the animal should be packed out within 24 hours. If daytime temperatures are  below 50 degrees, you can take your time, even several days if needed.

Other than rapidly cooling your meat, there are a couple additional ways to extend meat freshness. First, there’s a company out there that makes anti-microbial game bags. These bags can help slow bacteria spread on the surface of the meat where most  contamintatin takes place. Second, when flies are an issue, simply rub black pepper all over the surface of the meat.

Quartering Tools

Be sure to carry the right tools for quartering your animal. This includes a very sharp hunting knife with a built-in gut hook, a lightweight folding bone saw, a knife sharpener, and a 4-pack of lightweight game bags.

My favorite knife for skinning is the Outdoor Edge Swingblade. The locking blade converts to a dedicated gutting knife. Besides gutting, this extra blade easily unzips the hide and cape without cutting too much hair.

Outdoor Edge Swingblade skinning knife and gutting blade.

Some hunters prefer razor knives with replaceable blades like the Havalon models. Havalons are extremely sharp and capable of breaking down even the largest animals. But they aren’t ideal for skinning as they can easily cut through the hide.

I personally carry a small surgeon’s scalpel with cheap replaceable blades and use it in conjunction with my skinning/gutting knife. The scalpel is especially useful for caping and removing the hide from delicate facial areas.

Lightweight surgeon’s scalpel w/ replaceable blades.

Cooling Your Meat

The first step in cooling meat is to open the chest cavity and use a stick to spread the rib cage apart. Next, skin the carcass as soon as possible. The hair and hide is very good at insulating and will hold heat for a long time. An elk carcass left with the hide on can spoil even when left lying on snow.

Skinning is best accomplished systematically as you remove quarters if you’re using the “gutless method.” (See YouTube for videos on the gutless method). In this fashion, the hide is left intact and spread out on the ground as a barrier between dirt and the meat.

Once quartered and bagged, hang the meat in the shade to cool. Either hang the quarters in a tree or prop them up on rocks, logs or bushes to increase air circulation. Even in hot weather, meat will cool rapidly in the shade and will extend pack-out time.

Whenever possible hang the meat in the bottom of a valley and/or near a stream to cool overnight.

You can further cool meat by placing pre-cooled quarters in plastic garbage bags and securing the bags in a stream or river. Just make sure the sun isn’t hitting the bags as they can heat up even when submerged.

Finally, consider packing the meat out at night as this can keep both you and your meat from overheating.

Once the meat is hung you will need to figure out how many pack-out trips it’s going to take. This depends on your physical conditioning, distance, and terrain. Try to figure out how much weight you can safely carry long distances before going afield.

When dealing with trophy animals, the head, antlers and hide will add significantly more weight. You can always remove the antlers and cape from the head in the field, but take extreme care. Without adequate caping experience you could easily damage or ruin your trophy cape.

Using Pack Animals

Whenever possible try to enlist a number of friends and/or pack animals for the job. With today’s lightweight frame packs there’s practically nothing you and a couple buddies can’t pack out given enough time. The problem with backcountry hunts is that you may not have enough time to get the animal out before it spoils. This is where pack animals come in handy.

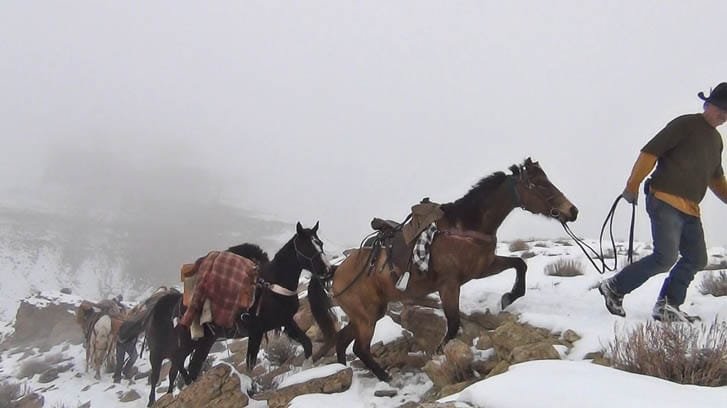
For backcountry wilderness hunts, consider hiring a horse packer. My brother once harvested a 2000 pound bison at the bottom of a snowy chasm. Retrieving his once-in-a-lifetime animal was only made possible by hiring a horse packer. It costed several hundred dollars, but was well worth the expense.

Horse packers with bison.

Another option is renting llamas or pack goats. My brother has a string of pack goats that have proven invaluable for packing elk out of the backcountry.

Having a couple horses will open up the vast wilderness to more hunting opportunities. Legendary trophy hunters like Kirt Darner and Robby Denning frequently relied on horses, not only for access, but for getting their trophies out of the backcountry.

The biggest drawback to owning pack animals is the year-round expense and maintenance involved, not to mention the burden of caring for them afield. But in my opinion, these trade-offs are tolerable if it means consistent success on trophy bucks.

Conclusion

It’s much easier to spend a couple extra days packing a critter out of some hell hole than hunting easy-access country for weeks on end without success. You just need to have an exit plan. This means being in good enough shape for an arduous pack-out, or using pack animals for the task.

A Road Hunt to Remember

My 2020 doe.

2020: A Year to Forget

As a dedicated bowhunter, the thought of driving dirt roads and looking for deer runs counter to everything I love about deer hunting. It took a dreary year like 2020 to push me to such detestable methods.

I beat myself ragged trying to find a buck in Utah that season. My usual public land area was swarming with stir-crazy city-folk fleeing the pandemic. All that commotion in the mountains drove big bucks back to their private land haunts and my hunt ended in failure.

Off to Idaho

When the hunt ended I turned my attention to Idaho where five years earlier I took an incredible trophy buck. With high hopes Esther and I loaded the truck and headed to Southern Idaho for last two weeks of bow season.

Upon arrival I was dismayed to see my beloved deer unit overrun by thousands of sheep. Severe drought and waves of sheep had decimated the deer habitat, and for ten days I couldn’t to turn up a single good buck. With only three days left and desperate for meat, I decided to take a doe.

Doe Hunting

I’d seen plenty of does running around, and I expected an easy, one-day endeavor. Boy was I wrong. On the evening of the 28th I hiked up a ridge with plenty of deer sign. A group of six does appeared feeding on a steep, wooded slope.

Just as I entered bow range, a woodpecker flew into a dead pine tree next to me. There was a small crack, and then a large branch came crashing to the ground next to me. Not surprisingly, the entire doe group spooked out of the area.

No problem, I still had two days left.

More Bad Luck

In the morning I headed back up the mountain. I was slowly picking my way through a patch of dry brush when a group of does appeared in front of me. I crouched down quickly and pulled an arrow. The wind was perfect and the does were oblivious to my presence.

Suddenly, the whole herd exploded in all directions and ran away. Flabbergasted, I stood up to see a pack of coyotes filtering through the brush. I was enraged and I launched an arrow at one of the intruders, but my arrow skipped off a branch and missed.

Perhaps I was trying too hard. It’s just a doe, after all! That evening I set up ambush on a roadside waterhole. Earlier in the hunt I’d seen deer near the water and figured it would be a good ambush spot.

The mountain was falling into shadows as I sat motionless 30 yards from the water’s edge. The pond was surrounded by trees, so a deer could approach from any direction.

I was lost in thought when I heard a light crunch behind me. Slowly I turned my head and saw a big doe pop out of the trees just 10 yards away. Before I could raise my bow, the doe snorted and bounded off. Of all the places to sit; what terrible luck! With only two hours of light left I called Esther to pick me up.

A Time to Road Hunt

No more mister nice-guy; desperate times call for desperate measures. Creeping around the cruel woods and sitting water had proved fruitless. It was time for some good old-fashion road hunting. Everyone knows that deer are much less concerned by slow-driving vehicles than camo-clad hunters.

We pulled onto a side road next to a big mud puddle left over from a past rainstorm. I didn’t think much of it because there was a camp full of drunken miscreants nearby blasting hip-hop music over their smoky campfire.

You can imagine my surprise when I spotted a lone doe standing on a hillside 100 yards away and looking longingly at the water. Clearly she was waiting for darkness to make a quick water run. With this in mind, we drove a short distance up the road. Once out of sight I hopped out and instructed Esther to drive further up the road and wait.

Racing against nightfall, I dropped into the timber and backtracked towards the water. It was so quiet that I couldn’t even shift my weight without crunching pine needles. Now I was stuck. I balanced my feet on two dried cow pies to muffle my footing and waited.

With only minutes of light left I began to wonder if the doe was going to show. Suddenly she appeared, silently weaving through the trees 15 yards in front of me. In a steady, slow movement I raised my bow and drew back.

The doe caught the end of my draw and jerked her head up in fright. Before she could whirl, my arrow was off, catching her in the shoulder. She spun around and crashed headlong into a Christmas tree, then got her feet and bounded away.

After confirming a good blood trail, I radioed Esther. Before I could get a word out she told about a doe she just saw by the truck.

“I don’t care about that, I just shot one! Come help me track it.”

Tracking Effort

The doe ran away so fast that the blood trail petered out quickly. The dug-in tracks led through the sagebrush and then crossed the dirt road, it’s hooves touching only once in the dust on the road before disappearing in some rocky terrain.

Three hours passed as we continually backtracked and crawled forward on hands and knees trying to find the next track or sign. We split up and wandered in ever-widening circles, but to no avail. How could this mortally hit animal elude us?

There was no choice but to back out and return in the morning. Coyotes howled in the distance as we walked back to the truck making me uneasy about leaving the deer overnight. Esther suddenly stopped and asked, “Hey can we just check one thing first?”

“What?”

“I wanna check where that doe popped out by the truck?” Could it be the same deer, she wondered?

I was doubtful, but the timing was uncanny. We turned around and walked back to the truck turnaround spot. On the way I interrogated Esther. “What was the deer doing? Was it running? Did it look hit?”

“No,” she replied, “It just walked out of the trees, saw the truck, and went back into the trees.”

“Well, we better take a look.”

Happy Ending

A minute later we arrived at the flat spot where Esther had parked. She showed me where the deer was standing, but there was no blood. Discouraged, we began walking in circles and you can imagine my surprise when I nearly tripped over the doe lying less than 20 yards from where she’d parked. What were the odds of my deer running 300 yards and expiring right next to the truck?

It’s been a long time since I’ve been proud of taking a doe, but that deer got us through the winter and was just what I needed after 37 fruitless days afield. As it turns out, adventure can be found just off the side of the road. Perhaps I won’t be so quick to disparage the fine art of road hunting in the future.

The End

Carbon versus Aluminum Compound Bows: Pros and Cons

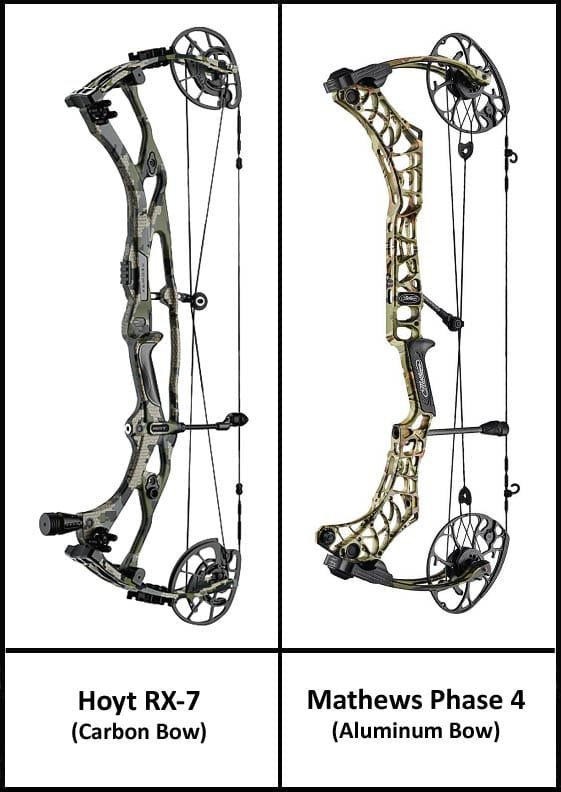
2023 model bows from Hoyt and Mathews.

Carbon vs. Aluminum Bows

If you are in the market for a new compound bow, one of the first things to consider is carbon or aluminum. There’s a pretty even split between hunting camps about which is better. In this article we’ll contrast the pros and cons of each bow type.

Let’s first take a look at carbon.

Carbon fiber bows aren’t really all carbon; just the main handle section, or riser, is carbon. The limbs are made of a variety of high-tech materials not relevant to this topic. Carbon fiber is very strong, stable, and lightweight which makes a perfect platform for anything from bikes to bows.

Advantages to Carbon Bows

The greatest advantage to carbon is that it’s lightweight, yet very strong. On average, a carbon bow weighs about a pound less than an aluminum bow. Aluminum is relatively dense and heavy. The only way to make aluminum lighter is by making it thinner, but that also makes it weaker. Aluminum bows aren’t really weak; they’re just not as tough as carbon.

Carbon bows are ideal for backcountry bowhunters who count every ounce. Lugging a heavy aluminum bow laden with arrows into extreme country can be a hindrance. And since carbon bows are stronger, they can stand up to more abuse in the backcountry. Another nice thing about carbon is that you can easily add more stabilizer weight to make it heavier, if you so choose.

Another advantage carbon has over aluminum is that carbon stays warm to the touch. The handle of an aluminum bow can become unbearably cold in freezing conditions. It’s not a big deal if you shoot with gloves on, but wearing thick gloves can be problematic and cause side-to-side torque issues.

Advantages of Aluminum Bows

First off, if you’re on a budget, aluminum might be your only option. Carbon bows run about 30-40 percent more expensive than aluminum bows. This averages around $500 difference. Higher end aluminum models list around $1200 whereas carbon bows hover around $1700. Currently, the most expensive hunting bow costs around $1800, and is made by Hoyt.

There are also more aluminum bows on the market than carbon bows. The whole carbon fiber manufacturing process is very expensive. Some bow manufactures don’t even make carbon bows simply because there’s a high enough demand for their aluminum offerings, and so they don’t need to invest in the expensive carbon technology.

Because aluminum is denser than carbon, aluminum bows tend to  have less vibration or “hand shock.” Fortunately excess vibration has been reduced in newer model carbon bows. Still, some hunters prefer a heavier bow. Simply put, a heavier bow is a steadier bow. Heavier bows are also less affected by crosswinds.

If you like aluminum bows but hate the weight, you can always replace the standard accessories (stabilizer, sight, quiver, and arrow rest) with carbon or composite materials. However, you’ll still be limited on how much you can ultimately reduce overall weight.

Pros and Cons Overview:

Carbon PROS

  • Lighter than aluminum
  • Stronger riser
  • Warmer to the touch

Carbon CONS

  • More expensive
  • More vibration
  • Less carbon bow choices

Aluminum PROS

  • Less expensive than carbon
  • Less bow vibrations
  • More bow choices

Aluminum CONS

  • Heavier than carbon
  • Cold in winter conditions
  • Not as strong

Conclusion

There is no right or wrong bow; both carbon and aluminum bows have their pros and cons. What it really boils down to personal preference.

If you prefer a lighter bow, carbon would be a better choice. If you’re on a tight budget, aluminum might be your only option. Maybe you just like the look and style of one bow over another. If you still can’t decide, just head to your local archery shop and see which one shoots and feels best in your hand.

How to Bowhunt Javelina: Tips and Tricks

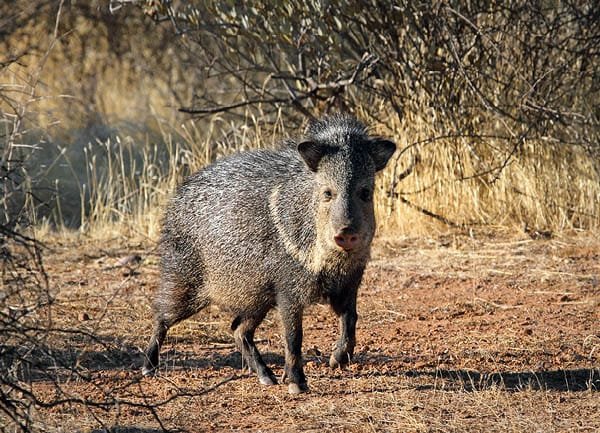
Javelina, aka collard peccary.

Bowhunting Javelina

A long, cold winter can be a dreary time for a committed bowhunter. But it needs not be. Lurking around the cactus and brush of the American Southwest desert is a fascinating creature that many people have never seen before. This coarse-haired, pig-like creature is the collared peccary, more commonly known as a javelina.

He stands about two feet tall and three feet long, and weighs between 30 and 60 pounds. He’s a clever, secretive creature that offers a fun and exciting challenge to any bowhunter.

The javelina is common enough in places like Arizona to procure a tag at least every other year. Best of all, most javelina hunts occur in the dead of winter, making it an ideal wintertime activity.

When and Where

Javelina are found sparsely over desert landscapes varying from 2000 to 5000 feet in elevation. It can take a while to locate them these small animals in the vast desert, so be sure you allow enough time to get the job done. I wouldn’t consider a hunt less than five days long.

Typical javelina country at 2500′.

For the novice javelina hunter, the near-sighted, unassuming javelina can be deceptively difficult to hunt. Like other “big” game animals, javelina are highly skilled at evading predators. Bowhunting success hovers around 25%, so it’s crucial to learn all you can before heading to the desert.

General Info

Javelina rely on their noses, ears and eyes to detect danger. Although javelina have relatively poor eyesight, they are still adept at picking up movement, especially within bow range. Their sense of hearing is very good, but their sense of smell is excellent, so always approach from downwind.

Javelina are territorial animals with home ranges averaging one square mile, but this can vary widely from place to place. Javelina travel in herds commonly between 8 and 10, but sometimes more.

Adult Javelina.
Photo Credit: Fir0002/Flagstaffotos

Rarely will you find a lone pig. If you do, be on the lookout for others that could ruin your stalk. Occasionally you’ll find small bachelor groups of two or three animals traveling apart from the main group.

Habitat

Like many other prey species, javelina are most active in the morning and evening. In winter when days are cold and short, javelina spend more time up and feeding. It’s not uncommon to find javelina feeding or traveling as late as 11 a.m. In the evening they tend to unbed an hour or two before dark, so morning is your best bet.

Dug out bed and scattered droppings.

Javelina bed down together in large, dug-out beds beneath mesquite trees or rock outcroppings. Beds usually have piles of scat scattered around the outside. The freshness of the scat will tell you whether you’ve found an active bed or not.

Javelina droppings are easy to identify, like that of a large dog. Interestingly, javelina have the runs much of the time, so keep an eye out for that too.

Food and Water

Although javelina are classified as omnivores, they’re mostly herbivores, and their favorite food is cactus. Although they eat a variety of cactus species, their favorite is the prickly pear cactus.

Begin by locating areas with high concentrations of prickly pear. Look for cactus that has been torn apart, scattered around, and chewed up. From there, continue your search into brushy draws, washes, and river bottoms.

Prickly pear cactus torn up and eaten by javelina.

Despite the arid environment in which they live, javelina don’t visit water regularly. Instead, they get most of their moisture from cactus and other plants they eat.

Scouting & E-Scouting

Before heading to the desert for the first time, make sure you do a little research. Start by contacting the biologist over the unit to get some good starting points.

Next, check the state’s fish and game website for more information. Arizona’s hunting website has a “Where to Hunt” page with a helpful overview of each unit, including access points and biologist notes (www.azgfd.com/hunting/units/). When hunting a new location, try to arrive a day or two early for scouting and glassing.

Spot & Stalk Tactics

Glassing south and southeast facing slopes early in the morning is the best strategy for locating javelina. Because they don’t have under-fur, javelina use the sun to warm up after a cold night. As the day begins to warm, glassing becomes less effective as the pigs head for cover and shade.

Esther glasses the brushy bottoms with binoculars.

Javelina are small animals that blend well with their habitat. A high-powered spotting scope on a tripod is far better than handheld binoculars. Always start your glassing from the highest vantage possible. Begin by glassing areas with plenty of cactus, and look for open hillsides above brushy draws or river bottoms. Javelina are mostly lowlanders and don’t spend a lot of time in steep country.

Once you’ve located a herd, plan your stalk based on two things: wind direction and the general direction the herd is headed. If it’s still early, the javelina will likely stay put, so you can take it slow and quiet. Later in the morning the herd is more likely to move during your stalk, so pick up the pace.

Sign and Tracking

The next step is to locate tracks, trails, beds and droppings. Javelina are creatures of habit and use traditional routes throughout their range. Locating trails is key to finding them. Trails rarely lead through the wide open, so begin your search in the brushy bottoms. On one occasion I unknowingly set my camp right next to a trail. Twice my wife watched javelina walk right through camp while I was out looking for them.

Javelina group tracks through desert.

Tracking is a great way to learn about javelina, like what they eat and where they sleep. Boars have larger, rounder tracks while juveniles and females have smaller, pointier tracks. If all the tracks you find are medium-sized with tiny tracks mixed in, then it’s likely a female and baby group.

Tracking is difficult in sandy or gravelly soil because it doesn’t hold detail well. But you can still determine the direction of travel by following the deeper, toe-end of the track which points forward.

When the track eventually runs into mud or hard dirt, you can make more determinations about the animals you’re following. Fortunately javelina travel in groups which makes tracking easier.

If you bust a group of javelina out of an area, there’s a good chance they’ll return after a day or two. In the meantime, keep moving. Javelina leave sign wherever they go. Watch for torn up cactus, beds and fresh scat piles. If the torn-up cactus is still bright green and wet, the javelina should be nearby. They also do a lot of rooting and digging, so keep an eye out for torn up ground.

Still-Hunting Tactics

During the day javelina can be found by still-hunting near bedding areas, especially around larger mesquite trees. Javelina have scent glands on their rumps which they rub on trees and rocks to mark their territory. When still-hunting it’s not uncommon to pick up their musky odor long before you see them. Just another reason to hunt with the wind in your face.

In areas with moderate to high hunting pressure, glassing can become futile. Once the animals are driven into heavy cover, you may never see them again. In the unit where I hunt, I’ve actually never seen a javelina while glassing. The animals always stay in thick cover and brushy bottoms, which makes still-hunting the best method for finding them. You just have to cover a lot of ground and follow tracks.

Ambush Tactics

Esther took this fine javelina as it traveled towards bedding area.

Ambushing heavily used trails, pinch-points, and active bedding sites is viable option. I’ve had best luck ambushing routes between 10 and 11 a.m. when javelina are moving to bed. The javelina’s poor eyesight allows you to set up closer than you might for deer or elk.

Sitting in a ground blind near a water hole can also be effective, but only on dry years. Although they get most of their water from plants, javelina will still visit water, especially if it’s unseasonably hot and dry.

Vocalization and Calling

Although there are some javelina calls on the market, I’ve found them to be marginally effective. I read once that javelina will come to a dying rabbit call, but in practice the javelina just got nervous and moved off.

It really depends on how much hunting pressure they’ve had. Javelina are curious by nature, but when pressured they tend to shy away from foreign sounds.

Otherwise, javelina are quite vocal. When traveling or feeding in heavy brush, javelina make continuous “woof” sound to keep tabs on each other. In the thick stuff you’re more likely to hear them before you see them.

If you spook a javelina but he doesn’t run, “woofing” may calm him down long enough for a shot. In some cases you can even use woofing to get them to step out from behind cover.

Once bedded, javelina are mostly silent. Occasionally herd members  will get into fights and make loud snarls and clacking sounds with their teeth, so keep your ears open.

Shot Execution

The bow and arrow set up you use for deer should work fine for javelina, just be sure to know your effective range beforehand. Javelina have a small kill zone of about 6 inches diameter.

Shooting distances will vary widely depending on terrain. Javelina can disappear quickly behind brush, even at close range. I’ve found most shots to be between 20 and 40 yards.

My first javelina with a bow.

Javelina are tough animals. A poorly hit javelina can run away at breakneck speed and be hard to track down, especially in thick or rocky terrain.

That being said, I’ve seen gut shot javelina go down pretty quickly, usually within 100 yards. The tall hair on their backs can trick you into holding too high, so always aim tight behind the shoulder and just below the centerline of the animal.

Javelina tend to stop abruptly when alerted. Unless you frighten him at close range, he’s likely to freeze up for a few seconds and give you time to settle your pin. If he busts out, however, he’ll likely sprint away without giving you a second chance.

Find Fresh Pigs

Over-pressured javelina learn fast how to avoid people. Once you bust a group several times—and maybe even shot at them—they can disappear completely for several days. At that point it’s best to find fresh critters. Continually chasing the same group will result in diminishing returns.

To avoid the curse of disappearing animals, I recommend hunting the opener when the pigs are still in their relaxed routine. If possible avoid hunting on weekends or near busy roads. Head to the backcountry whenever possible, and always have a couple backup areas in case your first area goes bust.

Harvest and Field Care

Despite what you may have heard, javelina provide excellent table fare. The meat is similar to pork, albeit a bit wilder, and lends itself well to southwestern cuisine like tacos and enchiladas.

Javelina skinned and hung to cool.

To avoid funky meat you need to use caution when skinning your animal. Their pungeant scent gland is easily identified on their lower back. Avoid touching it with your hands or knife. Once skinned, wash the carcass with cold water and hang it in the shade to cool

Conclusion

Bowhunting javelina is a fun and exciting way to hone one’s skills during the dark and cold months of winter. They are fascinating creatures that offer a unique challenge in a unique environment. I can’t recommend it enough.

Archery, Zen, and Hunting